What to buy
Three itemsThat is the whole list. The Pi 400 kit covers nearly everything — it is an entire computer built into a keyboard, and the power supply, mouse, and video cable all come in the box. You add a memory card, and a screen if you do not already have one.

Raspberry Pi 400 Full Computer Kit
The computer itself, built into a keyboard — 4 GB of memory, and everything to plug it in. Buy the Full Computer Kit, not the bare unit.

microSD Card — 64 GB, A2
Your child builds the whole computer onto this blank card in week one. Buy it new and buy this size — it must say A2 on the front, because slower cards corrupt and take a session’s work with them.

A Screen with HDMI
Needs to travel to class weekly, so think spare monitor or small portable TV — not the living-room set. Check section 02 before you spend anything. If you do need to buy, a 10.1″ 1366×768 monitor is the easy pick.
Prices above are approximate and are moving right now — there are ongoing supply constraints in the memory chip market, so the card in particular may cost a few dollars more than listed by the time you order.
If cost is a concern, please reach out before the first session so we can talk it through.
Check your display first
Do this before buyingYour child brings their screen to class each week, so it needs to be something portable — a spare monitor, an old one from a closet, or a small portable TV. Roughly 10″ to 24″ is the sweet spot. Please do not plan on the family television. If you do have a spare, the only thing that matters is the shape of the socket on the back — match it to one of these.
HDMI
14 mm wide · flat trapezoid
Wide, thin, and slightly narrower along the bottom edge than the top. Nearly every TV and monitor made after about 2010 has at least one. Photos just below.
VGA
Usually blue · 15 pin holes · two screws
The old one, with a thumbscrew on each side. If this is the only socket on the screen, that monitor cannot be used — the Pi has no analog video output.
DVI
Usually white · grid of square pins · two screws
Common on older desktop monitors. Adapters exist, but they are fiddly and we cannot troubleshoot them in class. Treat this screen as unusable.
DisplayPort
Rectangular · one corner cut at an angle
Looks a little like HDMI but one corner is clipped and the socket is squarer. It needs a powered adapter that does not always work. Check with me before you rely on it.
Ask JayUSB-C
Small rounded oval · same as a phone charger
Some portable monitors take video over USB-C, most do not. If this is the only socket, send me the model number and I will check it for you.
Ask Jay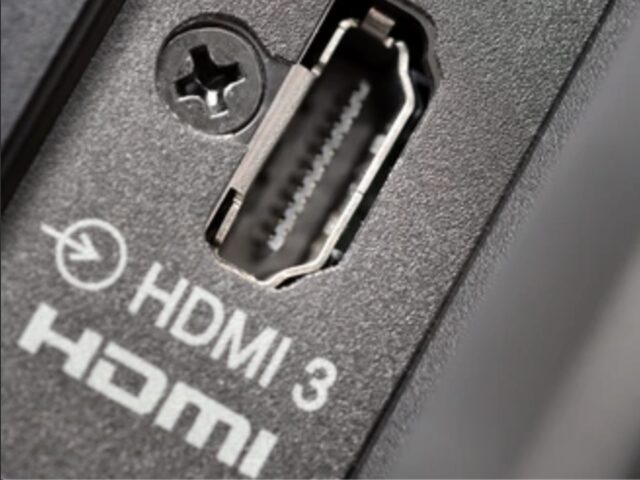
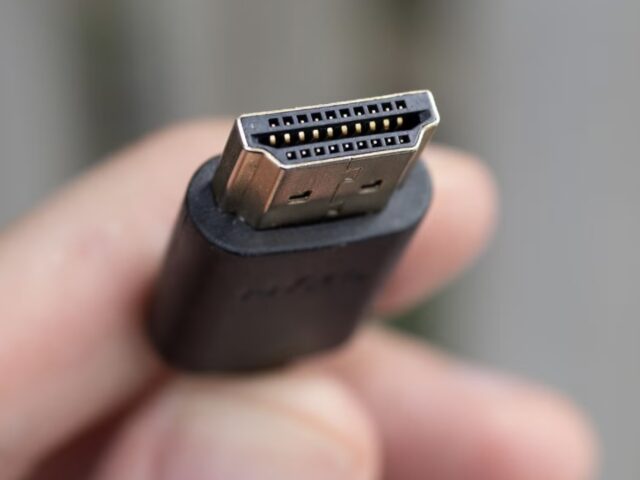
The socket on your screen will be labelled HDMI, often with a number after it — if there are several, any one will do. Note the shape on both halves: wide, thin, and narrower along the bottom edge than the top. If the plug on the kit cable matches a socket on your screen, you are set.
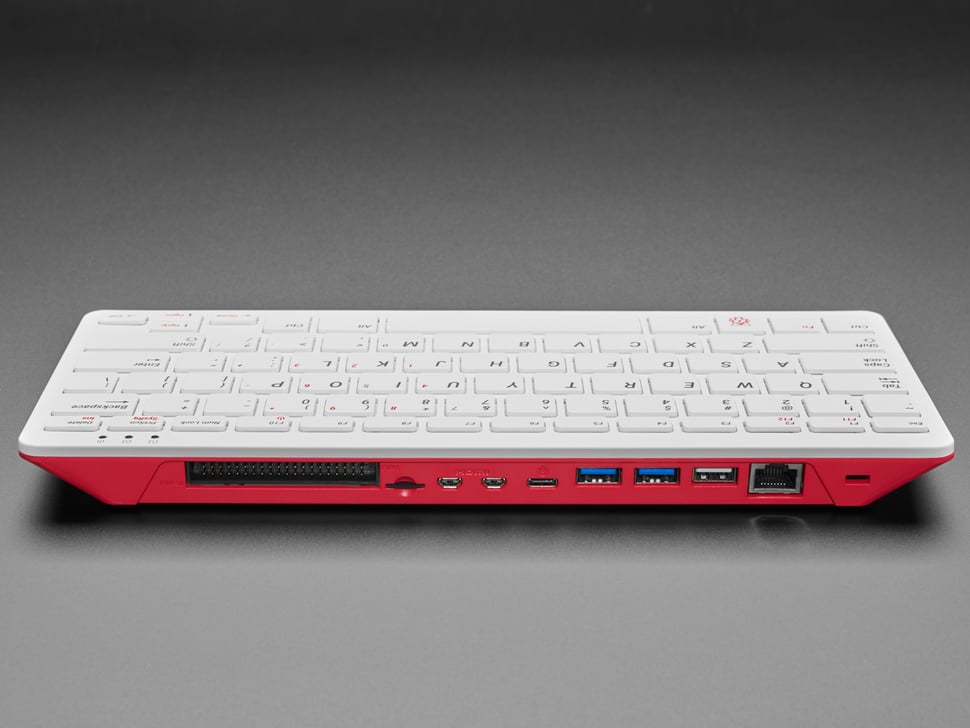
This is where everything plugs in. The two small sockets in the middle are the micro-HDMI ports — the included cable goes from one of those to the HDMI socket on your screen. Your child only needs one of them.
Not sure? Take a photo of the back of the monitor with your phone and send it to me. I would much rather answer that email than have a student arrive with a screen we cannot plug into.
If there is an unused monitor in a closet or a small TV from a spare room with an HDMI socket, and your child can carry it, you are already done — skip item 03 entirely and save about $60.